Sweet and Spicy Hoisin Beef

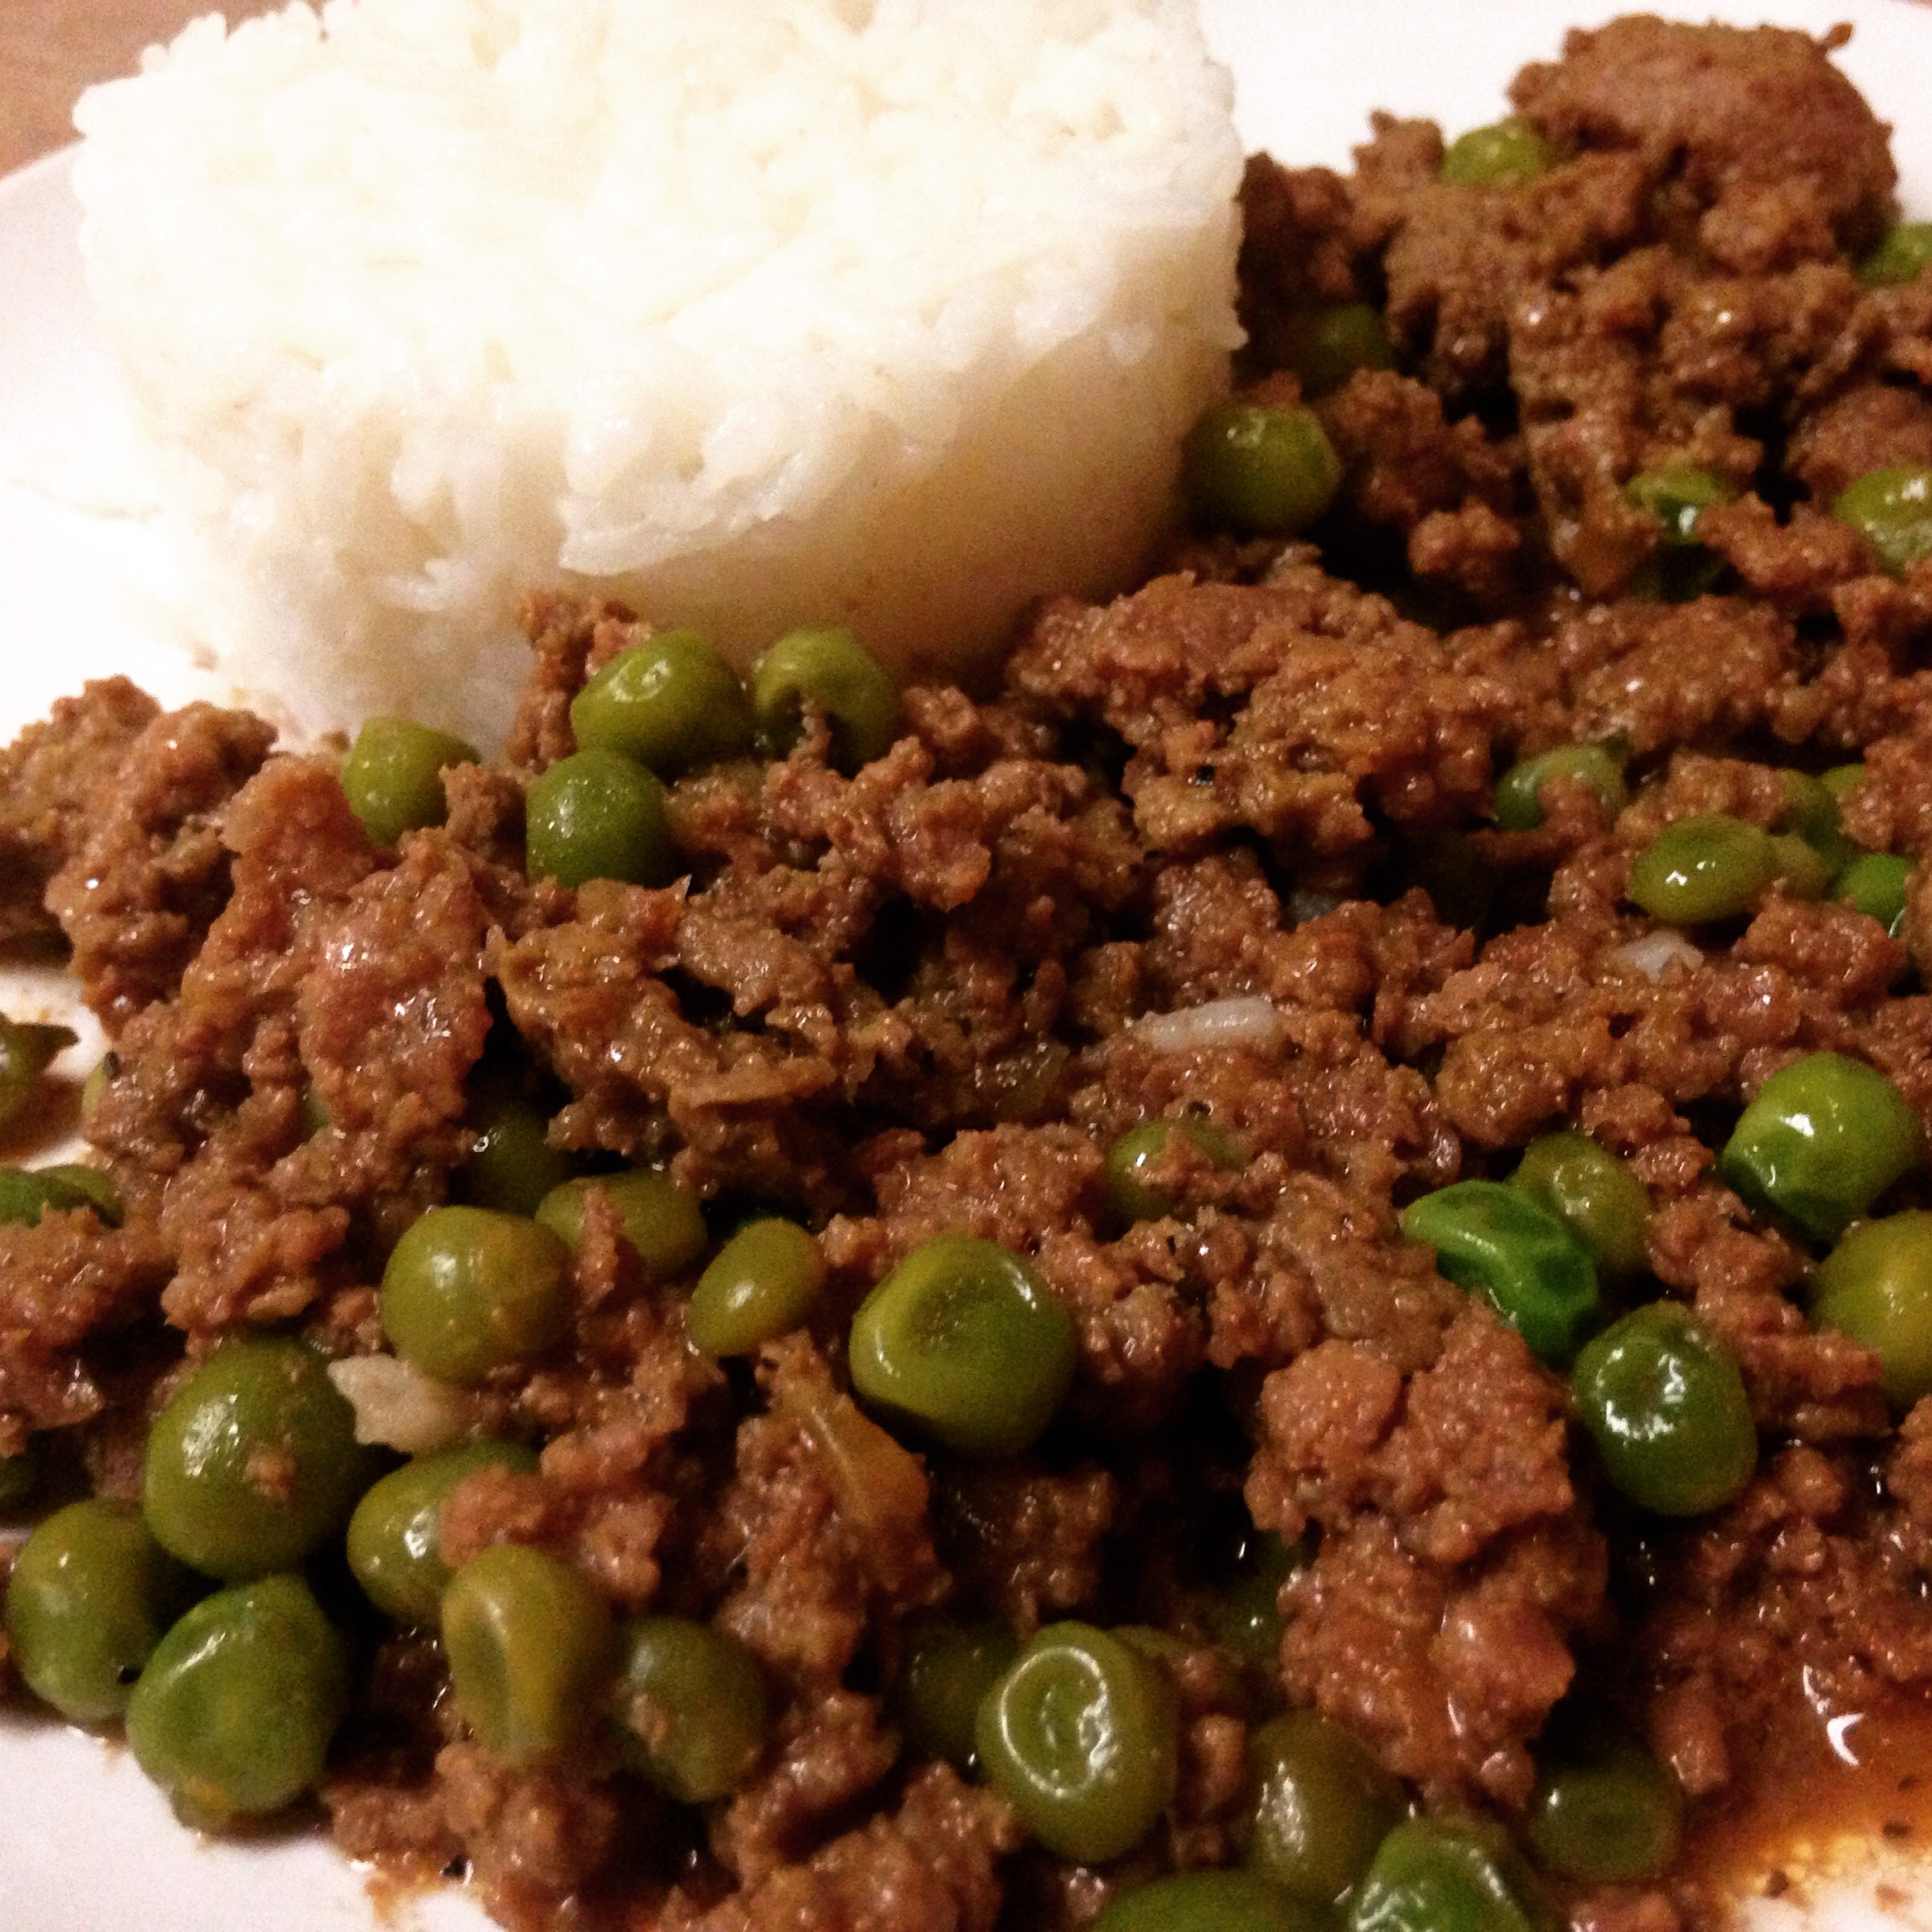
So my grocery delivery company has had to take a hiatus for a couple weeks and I know it sounds incredibly spoiled but now knowing how great it is to have local, fresh produce and meat DELIVERED to your house I’m incredibly upset that I have to go back. In absolute refusal of accepting reality, I decided to research some alternatives in the meantime. This led me to discover that my local grocery store offers free delivery for first time buyers. While its not local and not entirely fresh, my laziness allowed it. Unfortunately delivery could not happen until later this evening (considerably after dinner should be made and eaten) so I decided to raid my fridge and see what I could throw together. Originally I was planning on making a Puerto Rican style beef plate but I did not have any sofrito on hand.  After digging through my cupboards and doing a little research on what I had, this beautiful plate emerged.


hoisin beef


Ingredients:

  • 1 lb ground beef (lowest fat content possible)
  • 3 tbs hoisin sauce
  • 3 tbs pineapple preserves
  • 1 c frozen peas
  • 2 tbs garlic salt
  • salt/pepper to taste
  • 2 tbs sriracha (or to taste)

Putting it together:

  1. Over high heat, brown the meat.
  2. Once browned, add hoisin sauce, preserves, garlic salt, salt and pepper. Stir together to ensure all meat is covered in the mixture. Allow to simmer for 3-4 minutes.
  3. Add peas and sriracha sauce, stir together and allow to simmer 3-4 minutes more.
  4. Serve over white rice and enjoy!!


Spicy Kale Spread

I have had some cooked garbanzo beans in my fridge for a few days, and since I hate to waste food I decided I would make some hummus. When I did a mental check of what I needed I realized I was missing Tahini sauce. So I went on a google search to see what would be an acceptable replacement for Tahini sauce, on my search I realized that by even thinking a substitute was possible I proved I had no business making hummus in the first place. Not only did I not have Tahini sauce, but I also had the wrong type of bean!

Still bent on not having to throw away food, I decided to use hummus as an inspiration and make something more along the lines of a spread. When I opened my fridge for inspiration I decided I also had way too much Kale in the fridge and should probably find a way to sneak that in. After fighting with my horrible, awful, evil mini blender in getting all the ingredients smooth I ended up with this dangerously delicious Kale spread. Garlicky, spicy, fresh tasting…this spread is uh-mazing! Give it a try and let me know what you think!

Kale


Ingredients:

  • 1 serrano chili, deseeded (unless you’re feeling adventerous)
  • 5 garlic cloves (***This is def. not a valentine’s date recipe!)
  • 1/3 cup fresh parsley
  • 1 1/2 c garbanzo beans (I cooked them from dry)
  • Juice from 1 large lemon
  • Sea salt (to taste)
  • 1/3 c olive oil
  • 3-4 medium leaves of Kale

Putting it together:

  1. Toss all your ingredients in a blender, blend! If your blender is as evil as mine, feel free to toss in some water to make it easier to blend through (don’t let it become too watery!)
  2. Serve with chips as dip, on a sandwich as spread, or just spoon directly into your mouth!

Enjoy!

Teriyaki Chicken

So it’s been awhile since I posted anything, but I’ve officially entered crunch time for my wedding planning and have barely had a chance to cook nonetheless post anything. I’ve also decided to take a new turn on my little food blog and post the good, the bad, and the ugly. I’m not yet an actual professional chef and as such I’m still learning how to maneuver my way through the kitchen. As such, I feel like I’m misrepresenting myself a bit if I don’t post my failures alongside my successes. Please feel free to toss in your opinions, suggestions and overall comments.

Last night’s experiment was Chicken Teriyaki! I personally love chicken teriyaki, and I am always down for a late night drive to our local Yoshinoya. However, to save some costs and some calories I figured it was about time I learned how to make this dish at home.

After my first attempt at this dish last night, I deem it a B+. All the flavors of teriyaki were there, however I made the mistake of adding all the sauce onto the chicken while it baked so I was left with a more chickeny-watery teriyaki sauce rather than the sticky sweet version I was looking for. In the future I’m going to reserve a portion of the sauce to dress the plate once its ready for serving, this will keep it thick rather than watered down with the juices of the baking chicken.

See below for my recipe, let me know what you think:

Chicken Teriyaki

Ingredients:

  • 6 chicken thighs
  • salt to taste
  • 1 tbsp corn starch
  • 1/4 c cold water
  • 1/2 c white sugar
  • 1/2 c soy sauce
  • 1/4 c red wine vinegar
  • 1 clove garlic, minced
  • 1/2 tbsp ginger, minced
  • 1 tsp black pepper

Cooking:

  1. Preheat oven to 425
  2. In a saucepan, over medium high heat add all ingredients except salt and chicken thighs. Stir together, stirring constantly, and bring to a boil. Once at a boil, lower heat and continue stirring until the sauce is thick. (starts sticking to the whisk)
  3. Place chicken thighs in a baking dish and salt to your preference. Coat the chicken thighs with the teriyaki sauce (I coated it enough so some sank underneath as well). Reserve some sauce to drizzle over the plated food before serving.
  4. Bake for 40 minutes, applying a coat of sauce to the chicken every 10-15 minutes.

Serve over rice with a side of steamed veggies and drizzle with the reserved sauce and maybe some sriracha for a nice kick! Let me know what you think!

Sorry for the poor quality picture, see below for my plated dish.


image1 (5)

Salsa Fresca Jam

Salsa fresca…jam? Sounds like a crazy combo but man is it good! Kick your summer bbq’s to another level!

Salsa Fresca Jam


I don’t know why, but this morning I woke up with jam on my mind! I’ve attempted to make some jams before but was never very successful. So perhaps the perfectionist in me finally got tired of being a jam failure? Nevertheless, jam was on the menu today. After doing some research on pinterest and reviewing some how-to articles, I decided I was comfortable enough to give it a go. I ultimately chose this particular flavor as I had some extra chopped cilantro and tomato in the fridge from yesterday’s dinner. It ended up being a great choice as I finally made a successful, delicious, delicious jam!

Recipe: (Makes one canning jar)

  • 2/3 c sugar
  • 1 small lemon
  • 1/4 c minced cilantro (fresh)
  • 1/2 tbs salt
  • 1/2 tbs cumin
  • 1 tbs pepper
  • 1/2 tbs garlic salt
  • 1 heirloom tomato (chopped)
  • 3 oz tomato paste
  • 1/4 c minced spicy pickled carrots **Optional or can be subbed with jalapenos (I ran out of pickled jalapenos so I just used the leftover carrots to help add some spice but keep the sweetness)
  • 1 tspn unflavored gelatin

Cooking:

  1. In a saucepan over medium high heat, add sugar,lemon juice, cilantro, salt, cumin, pepper, garlic salt, tomato, tomato paste. Stirring constantly, bring ingredients to a boil.
  2. Once at a boil, reduce to very low heat, cover with a lid and simmer for an hour. (stirring every 15-20 minutes)
  3. At the hour mark, stir in minced carrots. Cover with lid and simmer for another 15 minutes.
  4. After 15 minutes, stir in gelatin powder until dissolved. Pour mixture into a sterilized canning jar and allow to cool in the fridge. **I’m not super positive on how long this can stay fresh in the fridge, but from my research it seems the shelf life is about a week.

Once cooled, pour this bad baby on EVERYTHING. So far I’ve added it to my burger, but I’m thinking about pairing it with some fresh mozzarella cheese and crackers. Let me know what combos you come up with!


1,2 Salsa

Well there are more than 2 steps, but this is a quick tasty way to make some homemade salsa (without the blender!)

_MG_0949


Recipe:

  • 8 oz can of tomato sauce
  • 1/2 yellow onion (chopped)
  • 2 green pickled jalapeno peppers (seeded, depending on how much heat you want)
  • 1 tsp cumin
  • 1 tsp oregano (dried)
  • salt to taste
  • 2 garlic cloves (minced)
  • 1 tbsp cilantro ( minced)

Cooking:

  1. Heat a pan over medium heat, add all ingredients and stir together.
  2. Bring to a boil (stirring occasionally). Once at a boil, reduce to low heat and simmer for 5 minutes.
  3. Remove from heat and allow to cool to room temperature. Serve at room temperature or chill in fridge until dinner!

This is a quick and easy way to whip up some tasty chunky salsa without the blender and without the roasting of ingredients. **If you like your salsa on the spicy side, I suggest leaving some or all of the seeds in. Remember though, those seeds pack a punch!)